This week's work ·
Rhubarb crumb cake, with the topping made first
Keep the cold butter for the crumbs and the softened butter for the cake. A nesting set helps organize the work, but a steady hand and enough bowl space matter more than the price.
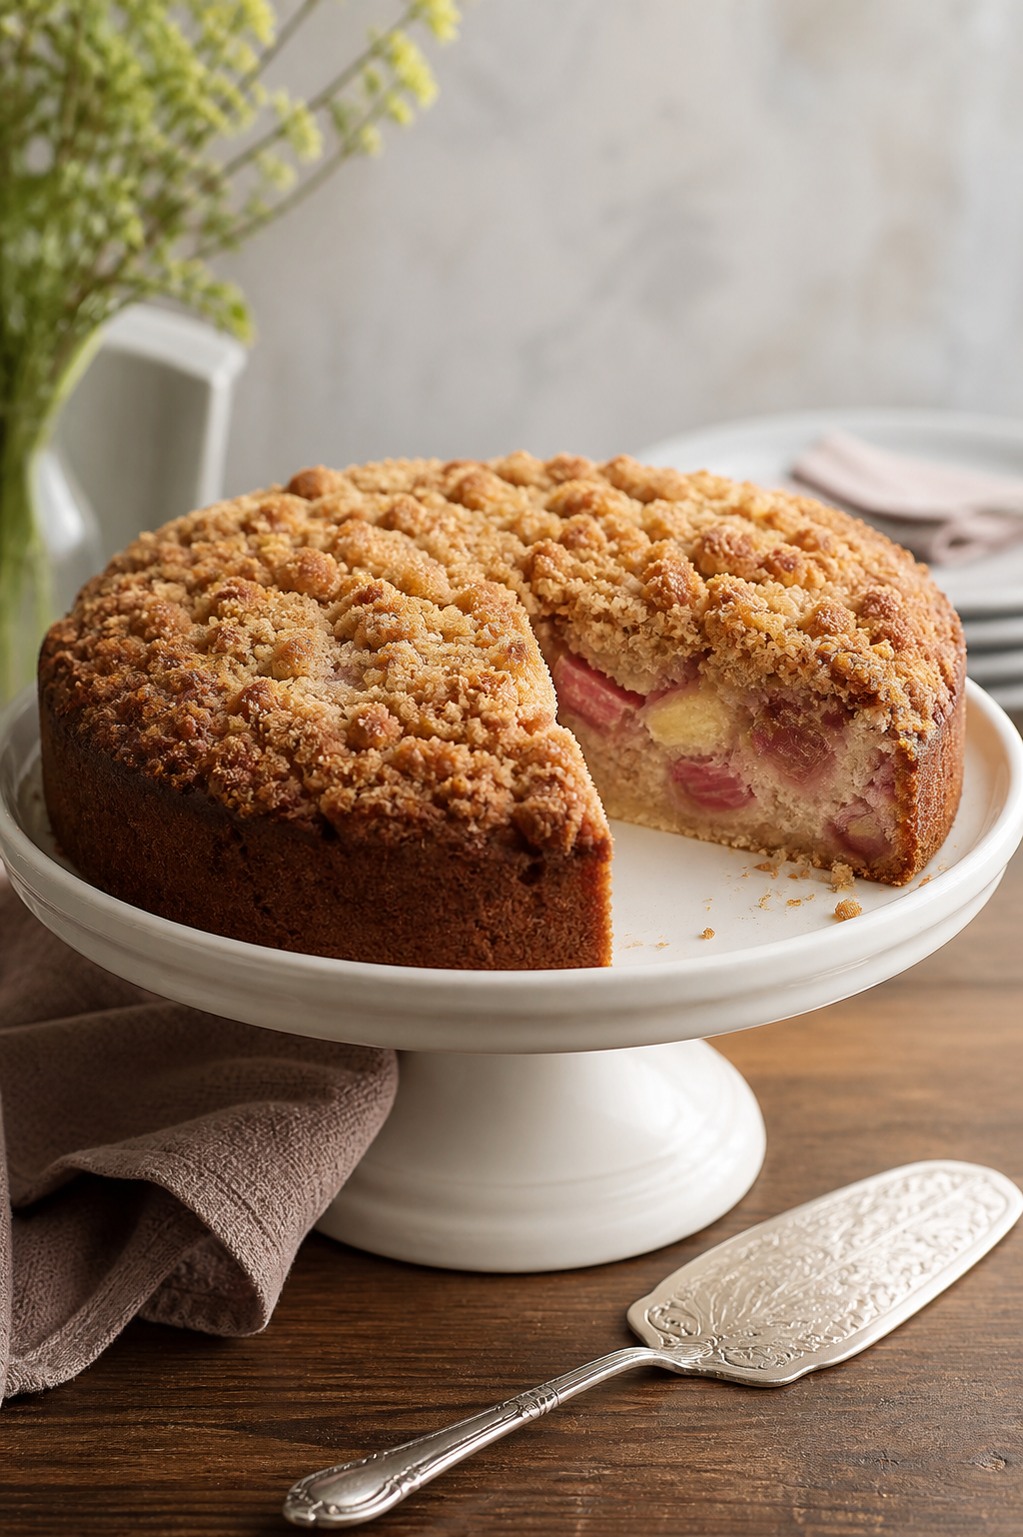
Rhubarb gives a spring cake something pleasantly sharp to work against. Before the mixing begins, clear a place for the chopped stalks and put the topping ingredients together. Keep the two flour quantities separate. The larger measure belongs in the cake, the smaller one in the crumbs; the sugars and butters have their own divided jobs too.
This is a good recipe for sharing a counter. One person can rub the cold butter into the topping while the other prepares the cake mixture. Wash and trim the rhubarb stalks, discard any leaves and chop the stalks evenly. Once the fruit is folded in, the batter needs space to turn without losing pieces over the bowl's edge.
Make the topping first so the finished cake batter does not wait while you search for another clean bowl. After baking, leave the cake in its pan for the full cooling interval before cutting. The temptation to hurry is understandable; the hot pan is not.
A set for the separate mixtures
For the mid-priced choice, Cuisinart's stainless steel mixing bowl set with lids has useful depth, nests for storage and includes lids. The higher-priced OXO Good Grips blue-and-gray three-piece set has stainless interiors with plastic exteriors and non-slip bases, without lids. Both list nominal capacities of 1.5, 3 and 5 US quarts. Those figures are not a measurement of how much rhubarb cake batter you can fold comfortably; use the large bowl and move up in size if you need more headroom.
Cuisinart makes the stronger case when covered preparation is useful beyond the cake. Its covers deserve checking: fit varies, with snug examples as well as lids that do not close properly. Rust-like spots are another concern. Neither the name nor the stainless construction makes a promise of flawless sealing or spotless care.
OXO's non-slip base is worth paying for if bowl movement makes creaming and mixing awkward. Keep a hand on the bowl when using a suitable mixer, and follow the mixer's instructions. The bowl's substantial feel divides preferences; grip does not necessarily mean easier lifting. Water can become trapped inside its outer shell, including after hand washing, so the more expensive choice has its own cleaning compromise.
We would choose Cuisinart for useful covered preparation and OXO when grip is the specific problem to solve. Neither gives the cake a better crumb by itself. Existing suitable bowls remain a sound choice. Keep the baking pan as a separate tool: this method calls for a 9-inch round cake pan.
On a small screen, scroll the table sideways to compare both choices.
| What matters | Cuisinart Stainless Steel Mixing Bowls with Lids | OXO Good Grips stainless mixing bowls — Blue/Gray |
|---|---|---|
| Budget | mid-priced | higher-priced |
| Construction | Stainless steel; grade not specified | Stainless steel interiors; plastic exteriors; non-slip bases; steel grade not specified |
| Included pieces | Three nesting bowls with matching storage lids | Three nesting bowls without lids; non-slip bases |
| Best fit | Covered prep when all lids seat properly | Grip while mixing, with separate food storage |
| Worth knowing | Inconsistent lid fit and rust-like spotting; dry under rims | Substantial feel not for everyone; water can become trapped between shell and steel, including after hand washing |
| Care | Dishwasher-safe per manufacturer; inspect and dry before nesting | Dishwasher-safe per manufacturer; water inside shell needs seller/manufacturer resolution, not a promised washing-method fix |
| Stated capacities | 1.5, 3, 5 US quarts | 1.5, 3, 5 US quarts |
02 · The recipe
Rhubarb crumb cake
Keep the cold butter for the crumbs and the softened butter for the cake. A nesting set helps organize the work, but a steady hand and enough bowl space matter more than the price.
- Prep
- 20 min
- Cook
- 55 min
- Total
- 95 min
- Yield
- One9-inch cake, about8servings
- Cool
- 20 min
Approximate planning times, including stated cooling; actual batch count, fruit preparation and dish geometry can increase elapsed time.
What you'll need
- 2 cups all-purpose flour
- 1 teaspoon baking powder
- 1/2 teaspoon baking soda
- 1/2 teaspoon fine sea salt
- 1/2 cup unsalted butter, softened, plus more for the pan
- 3/4 cup granulated sugar
- 1 large egg
- 1 teaspoon vanilla extract
- 2/3 cup buttermilk
- 3 cups chopped rhubarb (about 4 stalks), in 1/2-inch pieces
- 1/3 cup packed brown sugar
- 1/3 cup granulated sugar
- 3/4 cup all-purpose flour
- 6 tablespoons cold unsalted butter, cubed
- 1 tablespoon raw honey, for drizzling
Useful equipment
- Three mixing bowls with working headroom
- Whisk and suitable mixer or creaming utensil
- Folding spatula
- Suitable9-inch round cake pan
- Parchment
- Cake tester, oven mitts and cooling rack
Method
- Heat the oven to 350°F. Butter a suitable 9-inch round cake pan and line its base with parchment. Wash and trim the rhubarb stalks, discarding any leaves, and cut the measured stalks into 1/2-inch pieces. Keep the separate flour, sugar and butter quantities ready for their different jobs.
- In a bowl, rub together the brown sugar, 1/3 cup granulated sugar, 3/4 cup flour and 6 tablespoons cold cubed butter with your fingertips until crumbly clumps form. Set this topping aside, keeping it away from stove heat while you mix the cake.
- Whisk the 2 cups flour, baking powder, baking soda and salt in another bowl. In the large mixing bowl, cream the softened 1/2 cup butter with the 3/4 cup sugar, then beat in the egg and vanilla.
- Add the dry mixture and buttermilk alternately to the creamed mixture, mixing just until incorporated. Fold in the rhubarb with room to move the spatula; change to a larger bowl if necessary. Do not taste uncooked batter or raw crumb topping.
- Transfer the batter to the prepared pan and scatter the topping over it evenly. Bake for about 50–55 minutes, checking the cake beneath the crumbs with a tester: it should show no wet batter. Let the cake cool in its pan on a rack for 20 minutes. Drizzle with the measured honey and cut, handling the still-warm pan carefully with suitable protection.